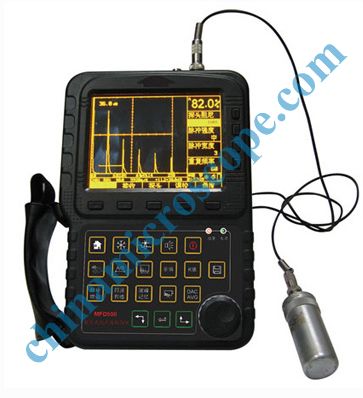
MFD510 ULTRASONIC FLAW DETECTOR
KEY FEATURES
MFD510 Portable Ultrasonic Flaw Detector with hi-resolution color TFT LCD
display.
The background color and the wave color can be selectable according to the
environment.
LCD brightness can be manually set. Continue working over 8 hours with high
performance lithium-ion battery module (with large capacity lithium-ion battery
option), easy to be dismantled and the battery module can be charged
independently offline. It is light and portable, easily to be taken by one
hand; easy operation; superior reliability makes it long life.
RANGE
0~
PULSER
Spike excitation with low, middle and high choices of the pulse energy.
Pulse Repetition Rate: manually adjustable from 10 to 1000 Hz.
Pulse width: Adjustable in a certain range to match different probes.
Damping: 100Ω, 200Ω, 400Ω selectable to meet different resolution and
sensitivity need.
Probe work mode: Single element, dual element and through transmission;
RECEIVER
Real-time sampling at 160MHz high speed
enough to record the defect information.
Rectification: Positive half wave, negative halfwave, full wave, and RF
DB Step: 0dB, 0.1 dB, 2dB, 6dB step value as well as auto-gain mode
ALARM
Alarm with sound and light,.
MEMORY
Total 100 configuration channels store all instrument operating parameters plus
DAC/AVG curve; stored configuration data can be easily previewed and recalled
for quick, repeatable instrument setup. Total 1000 datasets store all instrument
operating parameters plus A-scan. All the configuration channels and datasets
can be transferred to PC via USB port.
FUNCTIONS
Peak Hold:
Automatically searching the peak wave inside the gate and hold it on the
display.
Equivalent diameter calculation: find out the peak echo and calculate its
equivalent diameter.
Continuous Record: Record the display continuously and save it to the memory
inside the instrument.
Defect Localization: Localize the defect position, including the distance, the
depth and its plane projection distance.
Defect Sizing: calculate the defect size
Defect Evaluation: Evaluate the defect by echo envelope.
DAC: Distance Amplitude Correction
AVG: Distance Gain Size curve function
Crack measure: Measure and calculate the crack depth
B-SCAN: Display the cross-section of the test block.
REAL-TIME CLOCK
Real time clock for tracking the time.
COMMUNICATION
USB2.0 high-speed communication port
SPECIFICATIONS
Range: (0 ~ 9999) mm
Bandwidth: (0.5 ~ 15) MHz
Material Velocity: (1000 ~ 9999) m / s
Dynamic Range: ≥32dB
Vertical linear error: ≤3%
Horizontal linear error: ≤0.2%
Resolution:> 40dB (5P14)
Sensitivity Leavings: 60dB (flat-bottomed deep hole 200mmФ2)
Rejection: (0 to 80)% Linear
Noise level: ≤10%
Power supply: DC 9V; lithium batteries work for 4 to 8 hours or more
Ambient temperature: (-20 ~ 50) ℃
Relative Humidity: (20 ~ 95)% RH
Overall dimensions: 263 × 170 × 61 (mm)