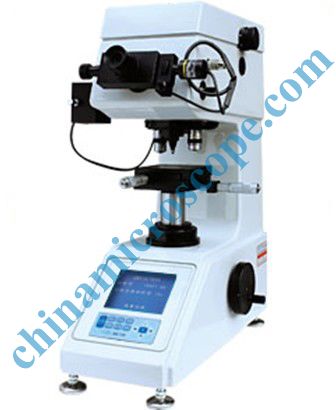
MODEL 310HVS-5 DIGITAL DISPLAY VICKERS HARDNESS TESTER
|
Feature & Use: |
|
Automatic turret shifting between penetrator and objective lens, RS232 data interface, built-in printer |
|
Hardness conversion between different hardness scales |
|
Automatic testing process |
|
Precision conforms to GB/T 4340.2, ISO 6507-2 and ASTM E384 |
|
It's suitable to determine the Vickers hardness of steel, non-ferrous metals, ceramics, treated layers of metal surface, and the hardness grads of carburized, nitrided and hardened layers of metals. It is and also suitable to determine the Vickers hardness of micro and super thin parts. |
|
Specifications: |
|
Measuring range: 5-3000HV |
|
Test force: 1.961, 2.942, 4.903, 9.807, 19.61, 24.52, 29.42, 49.03N (0.2, 0.3, 0.5, 1, 2, 2.5, 3, 5kgf) |
|
Hardness scale: HV0.2, HV0.3, HV0.5, HV1, HV2, HV2.5, HV3, HV5 |
|
Measuring accuracy of micrometer: ±0.2μm |
|
Resolution of micrometer: 0.01μm |
|
Test force dwelling time: 5~99 seconds (1 second for incremental quantity) |
|
Optical system: |
|
Objective lens: 10X (for observation), 40X (for measurement) |
|
Ocular lens: 10X |
|
Total magnification: 100X (for observation), 400X (for measurement) |
|
Range of measurement: 800um |
|
Max. Height of specimen:75mm |
|
Depth of throat:110mm |
|
Size of XY coordinate worktable: 100×100mm |
|
Travel of XY coordinate worktable: 25×25mm |
|
Resolution of XY coordinate worktable: 0.01um |
|
Optical source: 12v/20w |
|
Language: Chinese/English |
|
Power supply: 220V/110V, 50Hz/60Hz |
|
Power consumption: ≤30W |
|
Overall dimensions: 320×470×500mm |
|
Weight:58 kg |
|
Standard accessories |
|
Coordinate anvil: 1 pc. |
|
Thin shaft anvil (Ø0.3- Ø5mm): 1 pc. |
|
Thin plate anvil: 1 pc. |
|
Flat nose pliers: 1 pc. |
|
Large V-notch anvil: 1 pc. |
|
Small V-notch anvil: 1 pc. |
|
Diamond pyramid penetrator: 1 pc. |
|
Vickers standardized block: 2 pcs. |
|
Micro-Vickers standardized block: 1 pc. |
|
Optional accessories |
|
CCD camera and image processing system |